
how to hang
Here you will find useful information on how to hang your new Vintage Swing. Please read carefully and understand these instruction before proceeding. Remember: safety first. So if you are not confident doing this installation, please consult a professional.
And now for the disclaimer: The guides written on this page are just that, guides. Vintage Swings can not be held responsible for improper hanging.
hang in tree
The best way to hang a swing to a tree is using a threaded eye bolt drilled through the branch. This may seem like it would do more harm to your tree than just looping it around the branch and tieing it. This is false. Think of the hole as a piercing, it heals quickly and does very little damage to the surrounding tissue. Wrapping around the branch acts like a tourniquet, cutting off the circulation to the branch ultimately killing the branch itself . We will guide you through this fashion using our own Vintage Swing hardware.
1: find a tree branch
Perhaps the most important step. You want to find a sturdy tree branch to hold you and your loved ones. For our single-person swings we recommend a 6" diameter or larger tree branch. For out double-person swing we recommend 8" or larger. Basic rule-of-thumb would be: the bigger the better.
Ideally you want to have a branch which is parallel to the ground. A slight upward angle would also be acceptable. A very angled tree branch is usable but expect some wild trajectory when swinging since one rope will be substantially longer than the other.
2: measure
You want to measure out at least 3' from the trunk. At this distance you will have enough clearance to not hit the trunk, and the branch will still be quite strong.
If you are hanging from a larger diameter branch it is possible you can move this distance further out.
3: drill
Using a 1/2" drill bit, drill a hole from the bottom up trying to drill through the center of the branch and perpendicular to the ground. Measure out approximately 21" from that hole and repeat for the second hole. If this is a double-person swing, measure out another 21" and repeat for the third hole.
4: install eyebolts
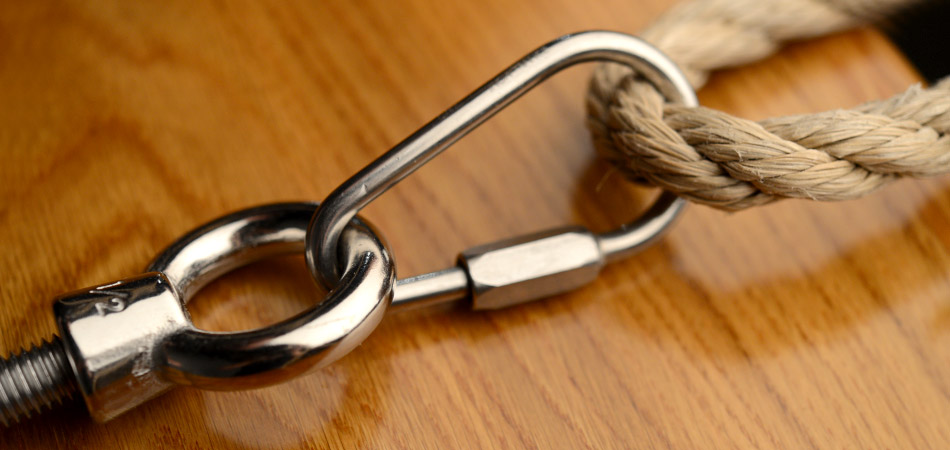
Using stainless steel eyebolts, push the rod through the hole from the bottom. Add supplied washer to the top threads and tighten supplied bolt. Tighten it down well and periodically check to make sure it is still tight. Over time the tree will grow over the hardware. Another critical reason stainless is ideal for this.
5: tie your knots
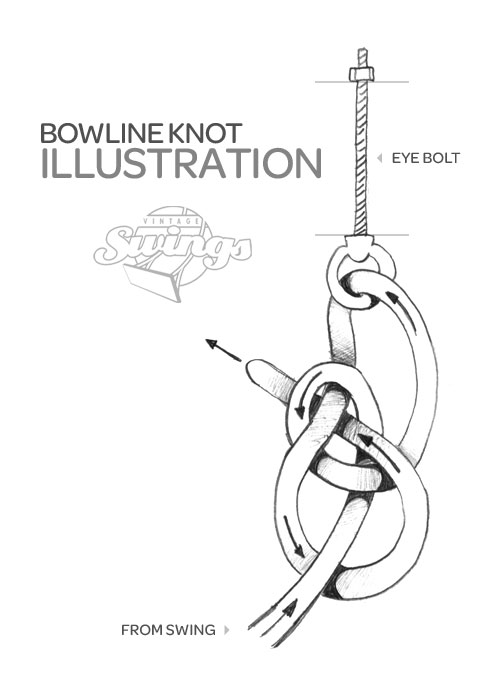
 Ok, so this may be the most important step. Not all knots do the same thing. We have found that a Bowline Knot works the best to hang our swings.
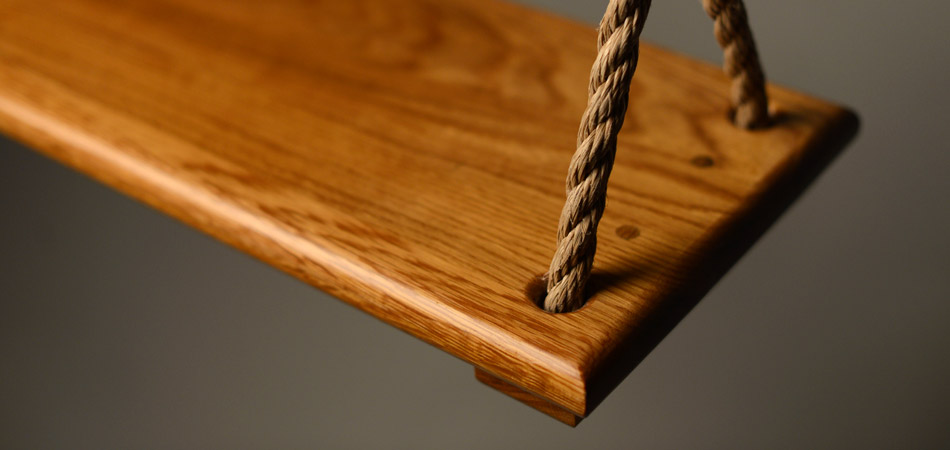
Place the swing seat on a chair or step ladder at the height you would like it to be. we like ours around 20". This is low enough for the kids, but high enough for adult legs to fit. This hieght is ultimately up to you. We also recommend placing it an inch or 2 higher than your final desired height since the rope will lengthen slightly when it 'settles'.
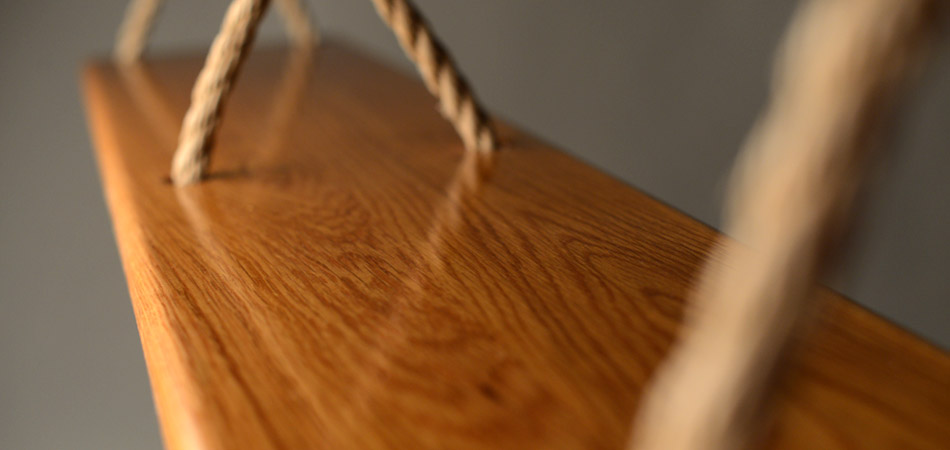
Then follow the diagram to tie the Bowline. You will see in the diagram you loop it first THEN slip through the eyebolt before carrying out the rest of the knot. There is no race, so take your time and make sure it is correct.
You may have to do this several time to get the desired seat height... but just think you'll soon be able to add Bowline Tier to your resume.
The best way to hang a swing to a tree is using a threaded eye bolt drilled through the branch. This may seem like it would do more harm to your tree than just looping it around the branch and tieing it. This is false. Think of the hole as a piercing, it heals quickly and does very little damage to the surrounding tissue. Wrapping around the branch acts like a tourniquet, cutting off the circulation to the branch ultimately killing the branch itself . We will guide you through this fashion using our own Vintage Swing hardware.
1: find a tree branch
Perhaps the most important step. You want to find a sturdy tree branch to hold you and your loved ones. For our single-person swings we recommend a 6" diameter or larger tree branch. For out double-person swing we recommend 8" or larger. Basic rule-of-thumb would be: the bigger the better.
Ideally you want to have a branch which is parallel to the ground. A slight upward angle would also be acceptable. A very angled tree branch is usable but expect some wild trajectory when swinging since one rope will be substantially longer than the other.
2: measure
You want to measure out at least 3' from the trunk. At this distance you will have enough clearance to not hit the trunk, and the branch will still be quite strong.
If you are hanging from a larger diameter branch it is possible you can move this distance further out.
3: drill
Using a 1/2" drill bit, drill a hole from the bottom up trying to drill through the center of the branch and perpendicular to the ground. Measure out approximately 21" from that hole and repeat for the second hole. If this is a double-person swing, measure out another 21" and repeat for the third hole.
4: install eyebolts
Using stainless steel eyebolts, push the rod through the hole from the bottom. Add supplied washer to the top threads and tighten supplied bolt. Tighten it down well and periodically check to make sure it is still tight. Over time the tree will grow over the hardware. Another critical reason stainless is ideal for this.
5: tie your knots
 Ok, so this may be the most important step. Not all knots do the same thing. We have found that a Bowline Knot works the best to hang our swings.
 Place the swing seat on a chair or step ladder at the height you would like it to be. we like ours around 20". This is low enough for the kids, but high enough for adult legs to fit. This hieght is ultimately up to you. We also recommend placing it an inch or 2 higher than your final desired height since the rope will lengthen slightly when it 'settles'.
Then follow the diagram to tie the Bowline. You will see in the diagram you loop it first THEN slip through the eyebolt before carrying out the rest of the knot. There is no race, so take your time and make sure it is correct.
You may have to do this several time to get the desired seat height... but just think you'll soon be able to add Bowline Tier to your resume.
hang in lumber
These steps will guide you through the process of hanging your new Vintage Swing in dimensional lumber. Hanging from a pre-existing beam is made easy using Vintage Swings' lumber hanger and bit.
1: find a place
Finding a beam to hang your swing from should be easier to find than a tree branch. Most porch beams/joists are designed to take on much more load then just the weight of the porch itself. If you have any questions about the load capacity of your porch or other proposed locations, please consult a professional.
2: drill
Using a 5/16" drill bit drill into your approved beam. Try to keep the hole perpendicular to the floor, even in a sloped ceiling. Measure out approximately 21" from that hole and repeat for the second hole. If this is a double-person swing, measure out another 21" and repeat for the third hole.
3: install hanger
Using our stainless steel lumber hangers screw them into the holes you just drilled. Screw them in up to the round portion of the hanger. Making sure you do not over tighten them and strip the hole.
4: tie your knots
Not all knots do the same thing. We have found that a Bowline Knot works the best to hang our swings.
Place the swing seat on a chair or step ladder at the height you would like it to be. we like ours around 20". This is low enough for the kids, but high enough for adult legs to fit. This hieght is ultimately up to you. We also recommend placing it an inch or 2 higher than your final desired height since the rope will lengthen slightly when it 'settles'.
Then follow the diagram to tie the Bowline. You will see in the diagram you loop it first THEN slip through the eyebolt before carrying out the rest of the knot. There is no race, so take your time and make sure it is correct.
You may have to do this several time to get the desired seat height... but just think you'll soon be able to add Bowline Tier to your resume.
These steps will guide you through the process of hanging your new Vintage Swing in dimensional lumber. Hanging from a pre-existing beam is made easy using Vintage Swings' lumber hanger and bit.
1: find a place
Finding a beam to hang your swing from should be easier to find than a tree branch. Most porch beams/joists are designed to take on much more load then just the weight of the porch itself. If you have any questions about the load capacity of your porch or other proposed locations, please consult a professional.
2: drill
Using a 5/16" drill bit drill into your approved beam. Try to keep the hole perpendicular to the floor, even in a sloped ceiling. Measure out approximately 21" from that hole and repeat for the second hole. If this is a double-person swing, measure out another 21" and repeat for the third hole.
3: install hanger
Using our stainless steel lumber hangers screw them into the holes you just drilled. Screw them in up to the round portion of the hanger. Making sure you do not over tighten them and strip the hole.
4: tie your knots
Not all knots do the same thing. We have found that a Bowline Knot works the best to hang our swings. Place the swing seat on a chair or step ladder at the height you would like it to be. we like ours around 20". This is low enough for the kids, but high enough for adult legs to fit. This hieght is ultimately up to you. We also recommend placing it an inch or 2 higher than your final desired height since the rope will lengthen slightly when it 'settles'.
Then follow the diagram to tie the Bowline. You will see in the diagram you loop it first THEN slip through the eyebolt before carrying out the rest of the knot. There is no race, so take your time and make sure it is correct.
You may have to do this several time to get the desired seat height... but just think you'll soon be able to add Bowline Tier to your resume.